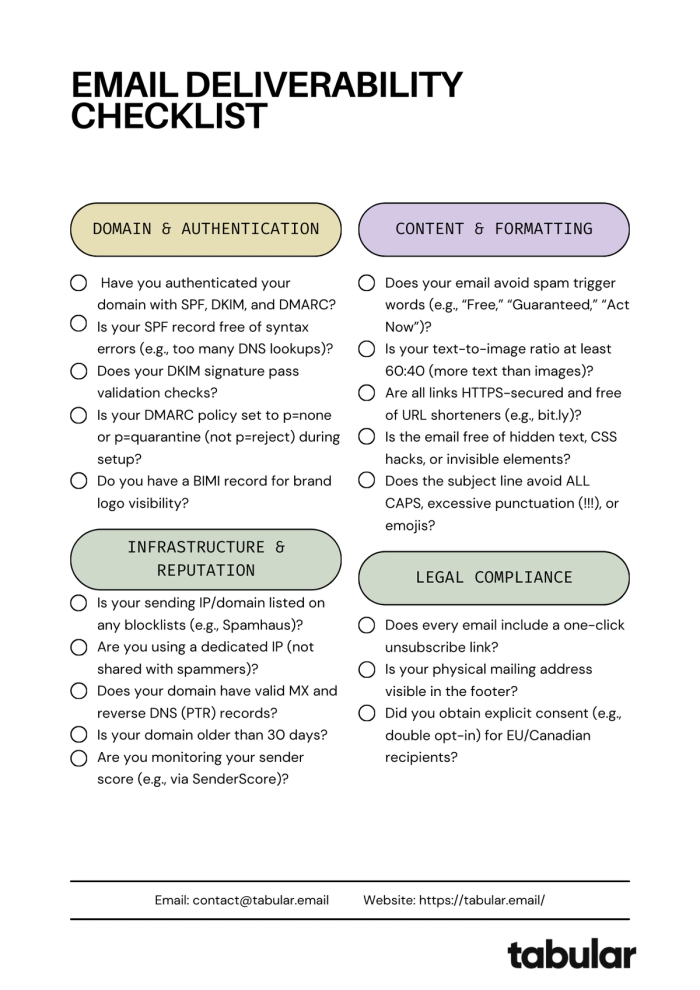
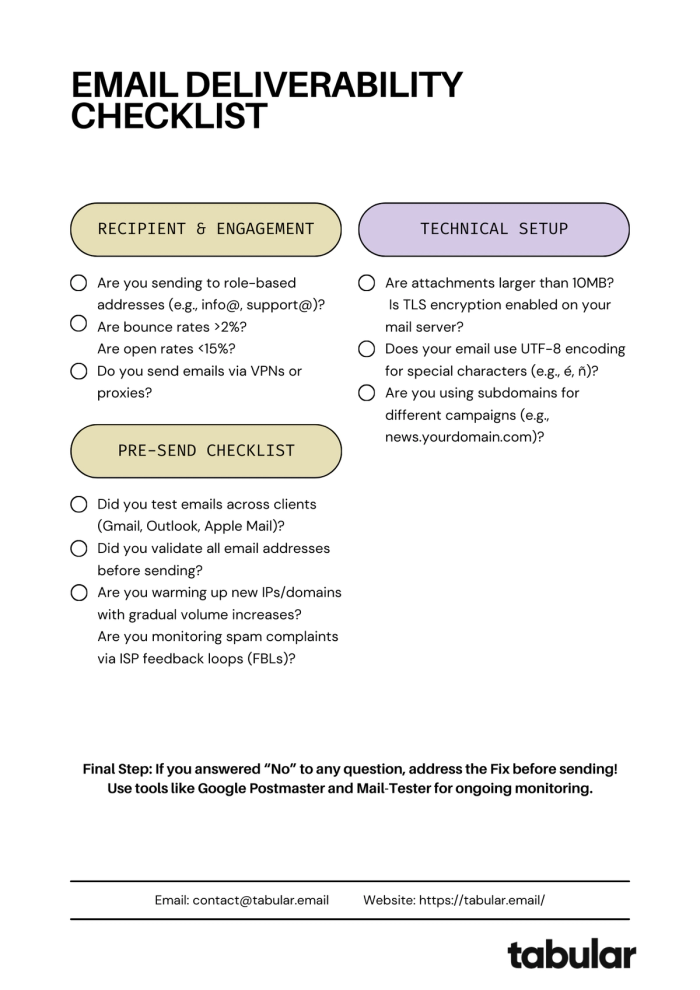
Email Deliverability Checklist to Avoid Being Flagged as Spam
Since no one seems to stop talking about it, you probably already know that the average ROI of emails is $36 for every $1 spent.
However, what no one tells you is that to reach that ROI, you need to have a great email deliverability rate or the rate at which your emails land in your recipient’s main inboxes.
If you’re not sure how to start, don’t worry—in this article, we’ll provide you with an email deliverability checklist that you can follow to increase your odds of reaching the recipients’ inboxes and avoiding spam filters altogether. Namely, we’ll cover:
- Email authentication to prove you’re a legitimate sender and pass spam filters.
- Auditing your sender reputation to benchmark how mailbox providers see your domain.
- Maintaining a strong reputation to ensure main inbox placement and avoid blacklists.
- Warming up your emails to gradually build trust with email service providers (ESPs).
- Maintaining proper email list hygiene to increase engagement and decrease bounces.
- Personalizing and testing to make users take action and ensure your emails are flawless.
Email Authentication
First things first, let’s talk about email authentication or the process of verifying who you say you are when sending emails. So, how does authentication impact deliverability? It’s simple: If you’re not authenticated, the recipient’s incoming mail server won’t let you get close.
Think of it as providing your passport at the border control: without it, the customs office won’t let you pass.
Now, fortunately, authenticating your emails is much more simple than obtaining a passport. Here’s what you need to do:
- Set up SPF records: The ‘Sender Policy Framework’ is an email authentication standard that informs the incoming server which IP addresses are allowed to send emails with a given email address.
- Implement DKIM: Short for ‘DomainKeys Identified Mail,’ these keys include information about the domain or address from which an email is sent.
- Configure DMARC: Or ‘Domain Message Authentication Reporting & Conformance’ is an authentication method, policy, and protocol in one. It leverages both SPF and DMARC and includes an extra alignment test.
- Set up a custom tracking domain: Similarly to how it’s nice to know whether your messages are ‘Seen’ in popular messaging apps, it also doesn’t hurt to know whether your recipients open or click through your emails. Custom tracking domains allow you to see exactly this and help you land in main inboxes since your emails will be marked as your own, without any outside domain being in the mix.
- Optimize your sender profile: Do you open messages from unidentified profiles on social media? I didn’t think so. That’s why you should include real names, photos, and accurate info on your sender profile, regardless of where you’re sending from.
- Link your mailbox to your outreach platform: Doing this is like tying a knot to a birthday gift you just packed. It keeps things secure and your emails delivered since it helps with configuring SPF, DKIM, and DMARC, builds trust with recipient servers, lets you track important metrics and more.
Auditing Your Sender Reputation
Sender reputation is a combination of your IP and domain reputation—and if you’re not reputable, ESPs will not let your messages reach their customers’ inboxes.
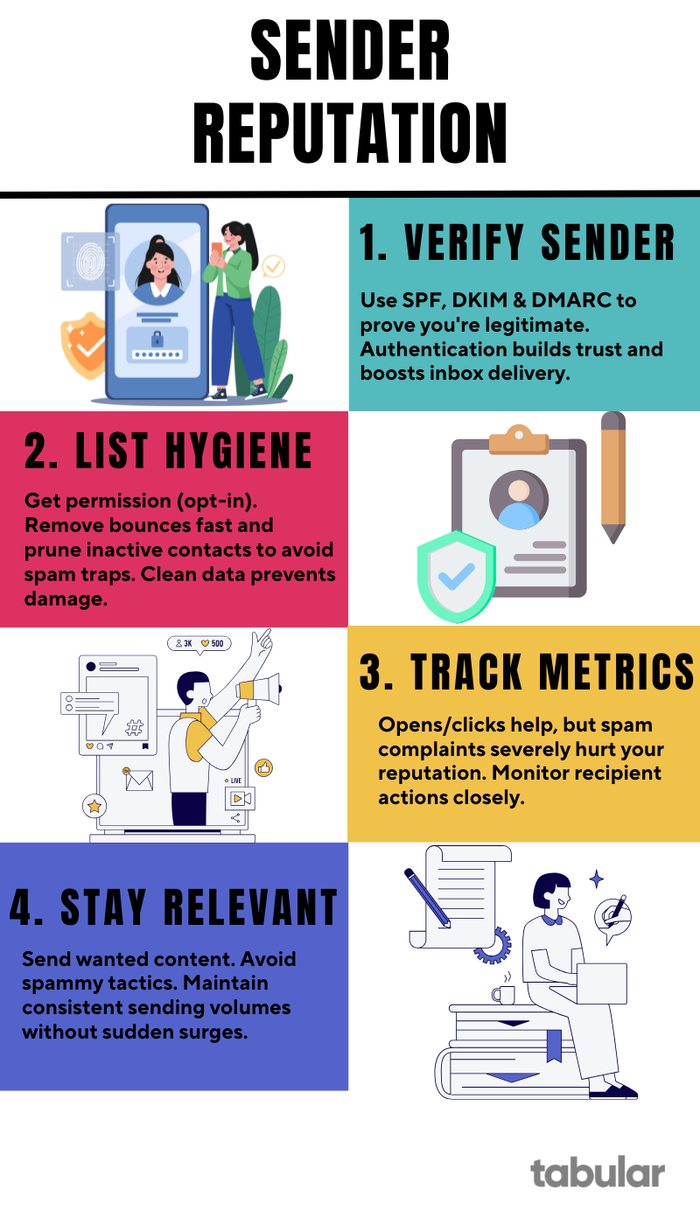
And here’s how you can check your sender reputation:
- Verify if your domain or IP is blacklisted: All major ESPs have blacklists where they keep email addresses reported for spam. If you’ve been reported by some users, you won’t get notified, which means you need to keep checking on your own.
- And to check if you’ve been blacklisted, we recommend the classic MxToolbox or the more fancy MailerCheck.
- Use reputation tools: Improving your reputation without any statistics would be like shooting in the dark, wouldn’t it? That’s why you should use tools like:
- Sender Score: best for low-volume senders.
- Google Postmaster Tools: best for high-volume senders.
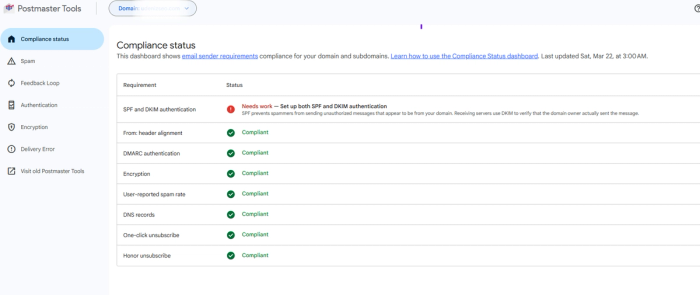
- Monitor the most important email metrics: Besides keeping an eye out for your reputation, you should also watch out for bounce rates, spam complaints, opens, and click-through rates. These heavily impact your overall sender reputation.
- Here’s a table that summarizes the optimal rates you should aim for:
| Metric | Optimal rate |
|---|---|
| Bounce rate | Under 5% |
| Spam complaints | Under 0.1% |
| Open rates | Between 15-25% for bulk emails |
| Click-through rates | Around 2.5% for bulk emails |
Maintaining a Strong Sender Reputation
Now that you know how to audit your sender reputation, it’s time to improve and maintain it. To do so, follow these steps:
- Improve your email engagement: To achieve the rates from the table above, more specifically, opens and click-throughs, you should try rethinking your campaigns. This includes testing different subject lines, trying out different sending schedules, segmenting your audience differently, etc.
- Provide an easy way to unsubscribe: Let’s be honest, you hate being unable to unsubscribe from unwanted emails, so why make it hard for your recipients? Moreover, if your unsubscribe button is hidden, they’ll likely just mark your email as spam, block it, and be done with it.
- Avoid spammy content: Spam filters love blocking emails with words such as “earn,” “buy now,” “free gift,” and other promotional nonsense.
- Analyze trends and diagnose issues: You need to keep up with the deliverability Kardashians. For example, in 2024, Google and Yahoo launched new sender requirements, which you need to follow if you don’t want your emails to be hitting the wall all the time.
- For following these news, we suggest the email marketing subreddit or various Slack groups like Email Geeks.
- Use a reliable email service provider (ESP): Lastly, even though you can use Gmail’s SMTP if you can live with its strict sending limits, I suggest using a reliable ESP. With a dedicated service, you’ll have more control over your email-sending environment, which includes custom configuration options, dedicated IPs, and the ability to manage your sender reputation more directly. Some ESPs you can use include:
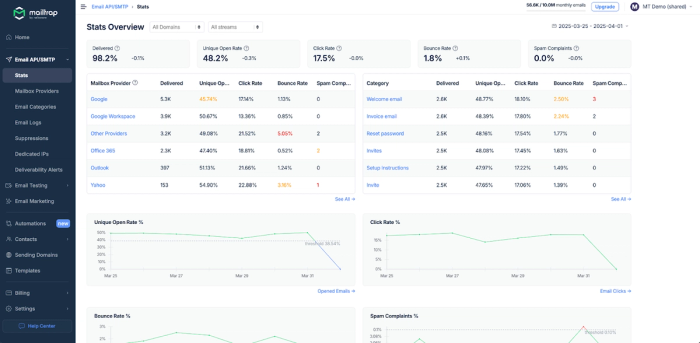
Mailtrap is an email delivery platform designed for developers, and marketing teams to send transactional, mass, and marketing emails with focus on high email deliverability and in-depth analytics. It provides both email API/SMTP and email marketing services.
Pros:
- High Deliverability: Dedicated transactional stream with domain verification improves inbox placement.
- In-depth Analytics: Helicopter-view dashboard and drill-down reports to check email providers stats (e.g., Gmail, Yahoo, Outlook, etc.).
Cons:
- Limited Free Tier: Only 1000 emails/month in the free plan, with stricter domain requirements for production use.
- No Marketing Tools: Automation is available only through Zapier.
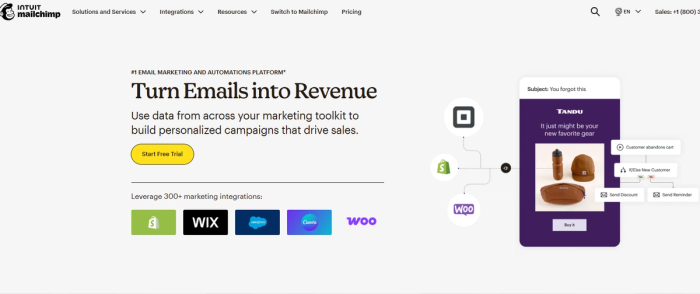
Another one is Mailchimp, they offer marketing automation for creating campaigns, managing audiences, and sending bulk/promotional emails. It offers AI tools, CRM, and integrations with eCommerce platforms.
Pros:
- User-Friendly Automation: Drag-and-drop builder and pre-built workflows like welcome emails and abandoned carts.
- Free Plan: Offers a limited number of monthly sends and basic CRM tools, making it ideal for small businesses.
Cons:
- Costly Scaling: Premium plans increase significantly in price, making it expensive as your contact list grows.
- Complex Pricing Tiers: The structure can be confusing, with separate plans for marketing, websites, and transactional emails.
Warming Up Your Email
Email warmup is the process of improving your email address, domain, or IP address reputation by gradually building up a sending volume.
Importance of Email Warm-Up
Gradual volume increase to build reputation
When you approach someone, you don’t start by bombarding them with questions. Usually, you start off with some icebreakers like: “Hey, how are you doing?” and such.
The same goes for sending emails and warmups. They’re essentially an email icebreaker for popular email providers like Gmail, Outlook, Office 365, etc.
Avoiding spam flags from sudden spikes
By warming up your emails, the ESPs will trust you more knowing your emails are being interacted with by their recipients. This way, you’ll pass spam filters, which results in an increased email deliverability rate.
The key thing to remember here is to avoid suddenly increasing your sending volume. If you do that, you will trigger spam filters and your emails will miss the main inboxes in a long shot.
Warm-Up Strategies
Typically, you have two ways to go about email warmup:
Manual warm-up schedules (step-by-step email volume increase)
Now, let’s say you want to start sending 500 emails per day. In that case, your warmup sending schedule would look something like this:
| Day | Emails per day | Max emails per hour |
|---|---|---|
| 1 | 300 | 60 |
| 2 | 390 | 80 |
| 3 | 500 | 100 |
But what about those who have more than 500 emails per day in mind? The industry standard is to increase the email-sending volume by 25-30% every day until you reach the desired sending amount.
Additional tips for manual warmup:
- Start with 200 emails per day.
- Send only to those who interacted with your emails in the last 30 days.
- Monitor bounce rates and make sure they are below 2%.
Automated warm-up tools
Would you rather avoid manual warmup labor and focus on other tasks instead? If so, check out some of these automated warm-up tools:
| Tool | Pros | Cons |
|---|---|---|
| Mailshake | Great for email outreach. Sales communication tools. User friendly interface. Responsive customer support. | Can get pricey due to the limited pricing plans. Data accuracy can get messy at times. |
| Mailivery | Warmup tool powered by AI In-depth analytics dashboard. Blacklist monitoring Customizable sending schedules. | Reports of slow support. Not the best for sending due to the daily limits |
Keep Your Email List Clean
Want to have fewer email bounces, increase your engagement rate, and boost your conversions? Start by maintaining a proper email list hygiene:
- Avoid purchased lists: Before you start cleaning, make sure not to buy any lists since purchased lists can cause significant damage to your deliverability and sender reputation. And this is just the tip of the iceberg.
- Validate your addresses: Make sure there are no:
- Disposable domains (e.g., example@mailinator.com)
- Role-based emails (e.g., admin@, info@, etc.)
- Misspelled domains (e.g., @gamil.com)
- Invalid addresses (e.g., johnDoe@)
- Try email validation services: Tools like ZeroBounce or Bouncer provide a quick and easy way to remove the addresses I just mentioned, all in a few clicks.
- Use verified email addresses: Send your new sign-ins a verification email to confirm there is someone behind the address.
- Remove bounced addresses: If an email bounced off of an address once, the chances are it’ll bounce again.
- Implement a sunset policy: As you don’t want to send emails to inactive users and ruin your engagement rate, you should define an inactivity threshold. For example, if a user hasn’t opened your emails in 6-8 months, stop sending to them and remove them from your list. Simple!
Personalization and Testing
With all said and done, it’s easy to forget about personalizing and testing your email content.
Personalization
When it comes to personalization, although it might not directly increase your deliverability rate, it will impact your odds of not getting marked as spam by recipients.
To personalize your emails, start by inserting your recipients’ first names in the greetings section. This works for newsletters, holiday emails, or any other emails. For this, you’ll need to enter variables, such as {{firstname}} or {{lastname}}, like in the example below:
You can also do the same for transactional emails when, for instance, you’re adding a sign-up mechanism for your web application or project.
Testing
Of course, when there are any variables included, at least some errors are bound to happen along the way. One of the most common ones is the name variables not loading, so your recipients might see something like:
‘Hello [First name]’
To avoid this, it’s best to test your email-sending functionality or your marketing campaigns. This includes testing whether:
- All emails are sent out
- The sending mechanism works fine
- The generated content displays the variables correctly
Wrapping Up: Get Your Email Deliverability Checklist Now
That marks the end of our article! We hope that you now have a clearer picture of what it takes to reach your recipient’s main inboxes.
One for the road: Keep in mind that improving your email deliverability and avoiding spam is a long-term process. Just like Rome, you simply cannot build it overnight, so the last tip we will give you is to be patient and not rush things since that can only backfire against you.
Looking for further improvements? Here’s an even more detailed email deliverability checklist that contains everything we’ve covered, plus more for you to follow:
