July 25, 2025
Tabular's Klaviyo integration joins the App Marketplace
Our Klaviyo integration has officially been accepted and published on the Klaviyo App Marketplace.
While we've offered our Klaviyo OAuth integration for a while, this significant step means our integration is now directly discoverable within Klaviyo's official pool of integrations.
For those of you already leveraging our integration, there's nothing you need to do. Your existing setup will continue to work seamlessly. This update simply enhances visibility and accessibility for new users looking to connect Tabular with their Klaviyo accounts.
May 8, 2025
Custom code block
We have added a code block to the list of basic blocks that are available in Tabular's email editor. You can now drag the code block and drop it anywhere in your email to embed custom (HTML) code in your email. This is perfect for if you want to embed custom code that you've received from a third party tool like Typeform for example.
April 24, 2025
Special character encoding
When exporting email designs as HTML emails, we have now added a new export option. The option lets you decide if you want to encode special characters to HTML entities. When enabled, our HTML generator will encode special characters like accented vowels.
April 23, 2025
Mailtrap integration
Read our Mailtrap integration page to learn how our integration with Mailtrap works and how to start using Tabular with Mailtrap.
Mailtrap is a high-deliverability email platform for sending marketing, mass, and user-triggered emails. By combining Tabular with Mailtrap, you streamline your marketing efforts: upload your Tabular emails to Mailtrap in one click and send them directly to recipients’ inboxes via Mailtrap.
The Mailtrap integration allows you to create and manage your Mailtrap email templates in Tabular. It automatically adds a template to your Mailtrap account. Whenever you have made any updates to your email in Tabular, you can use your Mailtrap connection in Tabular to update the Mailtrap template.
April 16, 2025
Links in plain text emails
We have improved our plain text email generator: it now also includes URLs to any textual links you have in your email design. The URL to the link will be placed right after the link text within parentheses.
April 9, 2025
Commenting on emails
Today we've added a new functionality that will help you work better together on emails: commenting on emails. You can now go into commenting mode and place a comment anywhere on your email design. Your teammates that also have editing access to that email can then reply and resolve your comments.
Comments are specific to the viewport and language version of the email you leave the comment for.
In the top center of the email builder you will find a comment button. Click on it and you will go into commenting mode. In commenting mode you can click anywhere on the email canvas to leave a comment. In commenting mode you will also notice that a sidebar will appear on the right side of your screen that provides an overview of all open and resolved comments in your email. Click on any of the comments listed in the sidebar to quickly view each comment with its replies in detail.
March 19, 2025
listmonk integration
Read our listmonk integration page to learn how our integration with listmonk works and how to start using Tabular with listmonk.
The listmonk integration allows you to create and manage your listmonk email templates in Tabular. It automatically adds a template to your listmonk instance that uses your Tabular email template. When connecting a Tabular email to your listmonk instance, you can choose to either create a campaign or transactional template in listmonk. For transactional templates you can manage the subject line for your listmonk transactional template in Tabular in the Checklist configuration of your Tabular email. Whenever you have made any updates to your email in Tabular, you can use your listmonk connection in Tabular to update the listmonk template.
March 17, 2025
MailerSend integration
Read our MailerSend integration page to learn how our integration with MailerSend works and how to start using Tabular with MailerSend.
The MailerSend integration allows you to create and manage your MailerSend email templates in Tabular. It automatically creates a MailerSend template for your Tabular email design. Whenever you have made any updates to your email in Tabular, you can use your MailerSend connection in Tabular to update the MailerSend template.
March 4, 2025
Reusable teamspace styles
Today, we've added a new functionality to Tabular that would help you to have automatic consistent styling in all emails throughout a teamspace.
With teamspace styles you can create a library of default styling for each type of block (headings, paragraphs, buttons, images, frames, links). You can use it to streamline your brand identity in terms of colors, spacing, and typography.
You can modify the default styles, but also create custom teamspace styles, for example 3 reusable variants of button styling (e.g. a red button style, black button style, blue button style).
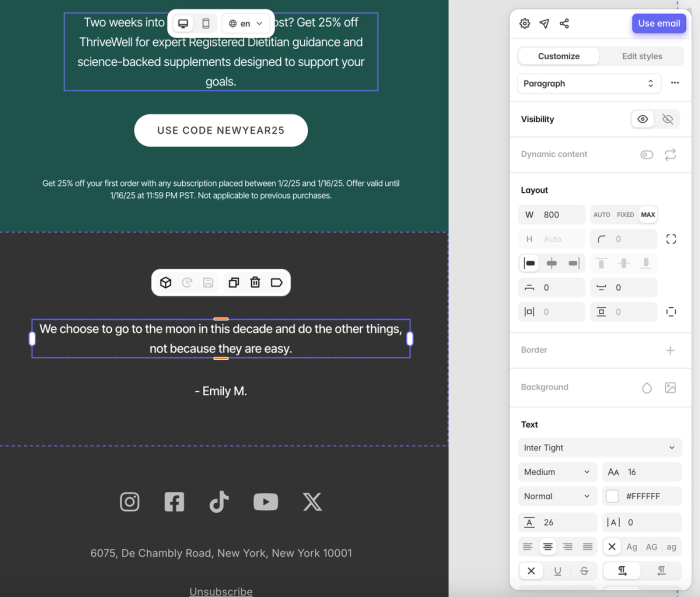
For example, this is the styling menu to 'Customize' an individual block:

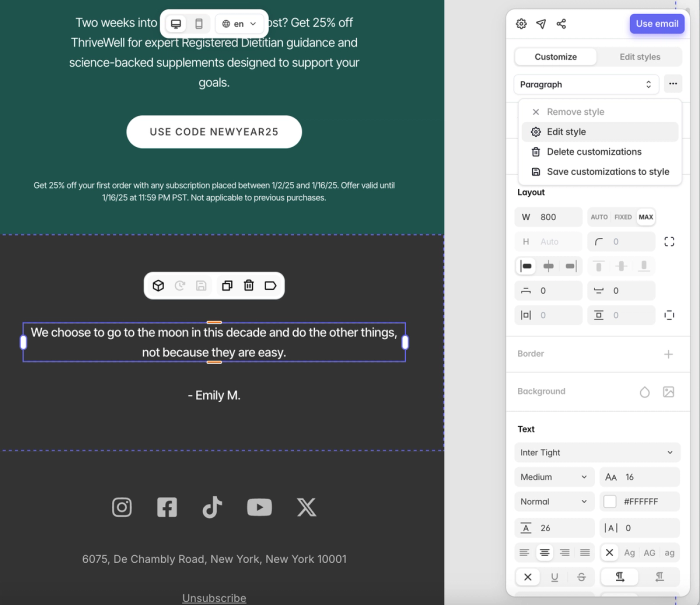
But we can also modify the underlying default Paragraph styling, by clicking on 'Edit style':

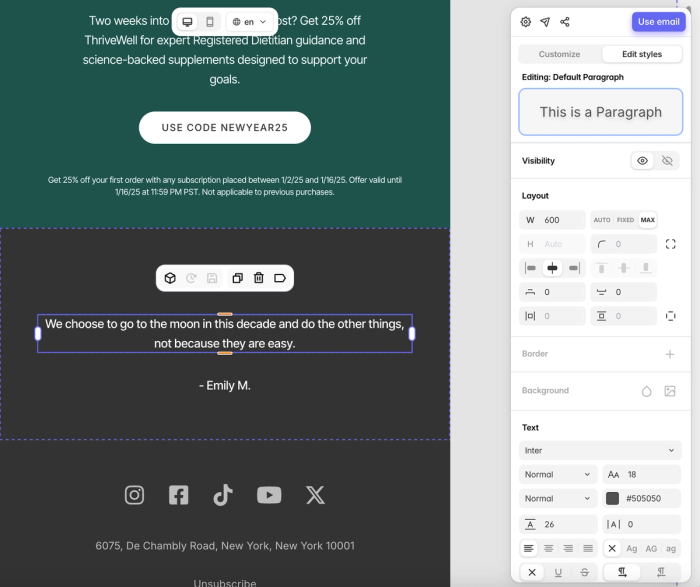
Modifications to the default Paragraph styling are stored to the Teamspace Library, automatically synchronized and used in every email document within that Teamspace. This allows for automatic consistent brand identity styles across all email designs:

As mentioned you can similarly create and save custom teamspace styles for each type of block that you can reuse in every email within your teamspace. Perfect for if you have for example various heading, paragraph or button variants that you want to reuse in several emails throughout your teamspace.
Whenever you make any changes to these default and custom teamspace styles they are automatically synchronised to all your other emails when you open them. This means that you can now easily keep your brand identity consistent over all your emails.
February 25, 2025
Word-break styling
It is now possible to prevent very long words from breaking to the next line when the text container width becomes too small. Normally, when a very long word is longer than its container, the long word will break to the next line. In some cases you might want to prevent that single word from breaking.
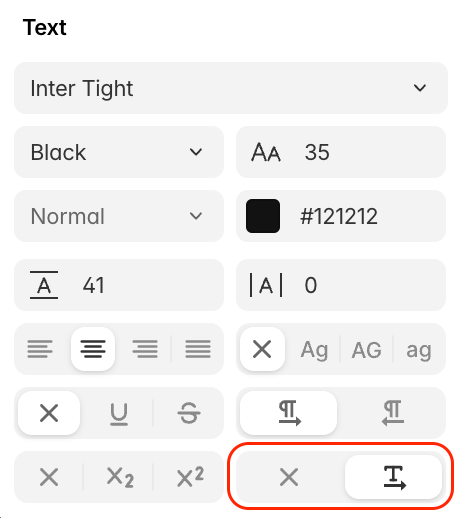
You can now prevent the word from breaking by selecting that word in the text editor, and then setting the new 'white-space' text styling setting to the 'nowrap' value:

This will prevent the selected text from wrapping to the next line when text overflow occurs. Please be careful when using this functionality however, since it can also break your layout if not used correctly.
Outlook email clients on Windows devices won't support this new setting, because they don't support the 'white-space' CSS setting. Therefore, we recommend to only use this setting in mobile mode when you want to prevent a long word from wrapping to the next line because the container width becomes smaller when shown on mobile devices.